Create an Extension with JavaScript
Writing a Simple Extension
The JavaScript Extension will show you a work area where you can name your extension and write your code.
You must give your extension a name. The description you give the extension will show in the dialog a user sees when running the extension.
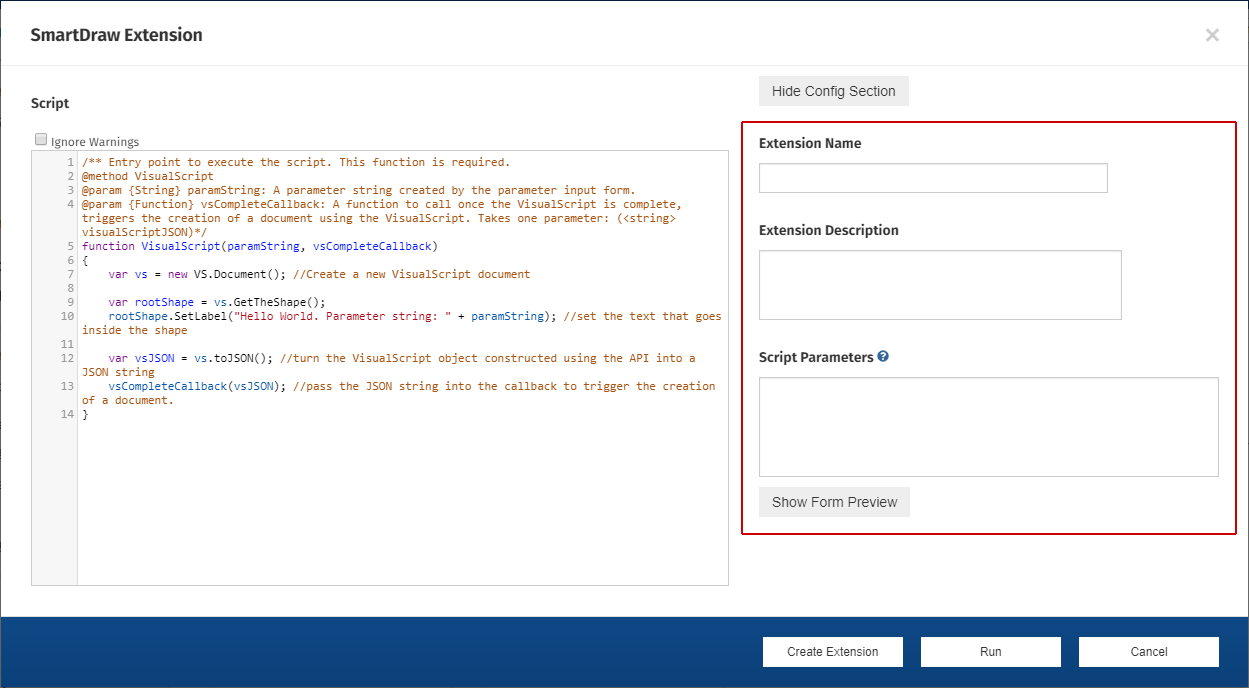
Let's go over writing a simple "Hello World" extension. The VisualScript SDK is already loaded in this editor so you can reference all the classes and methods in the SDK to generate a visual.
To learn more about the classes and methods available, read this detailed reference guide to the SDK.
Here's the script that we will be loaded by default to show you the most basic construction of an extension:
@method VisualScript
				@param {String} paramString: A parameter string created by the parameter input form.
				@param {Function} vsCompleteCallback: A function to call once the script is complete, triggers the creation of a document. Takes one parameter: (<string> VisualScript JSON)*/
				function VisualScript(paramString, vsCompleteCallback)
				{
					var vs = new VS.Document();

					var rootShape=vs.GetTheShape();


					rootShape.SetLabel("Hello World. Parameter string: " + paramString);


					var vsJSON = vs.toJSON();
					vsCompleteCallback(vsJSON);
				}
Passing Script Parameters
SmartDraw lets you define variables that will appear as fields in a form to an end user. This is called the UI Builder.
You define these variables in the Script Parameters section of the dialog.
These fields will capture a string to pass to a JavaScript function with field tokens that are replaced by their values.
Field tokens are defined with matching double curly brackets separated by commas:
{
				"IssueID":"{{Issue}}",
				"ProjectID":"{{Project}}"
				}
Using this syntax for variables creates a form for the end user to input values. You can also set their defaults and provide a label and description.
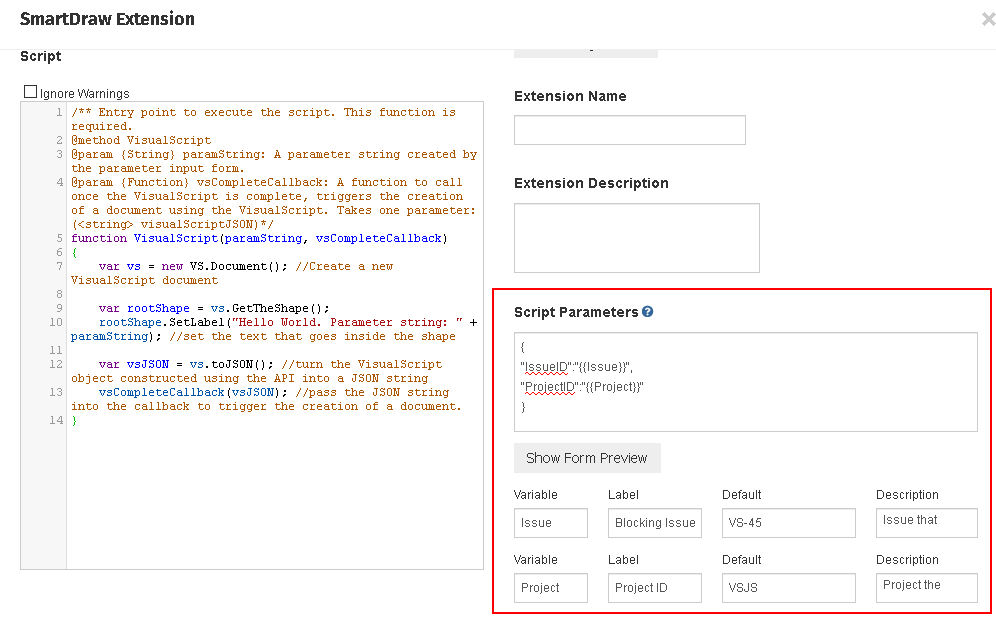
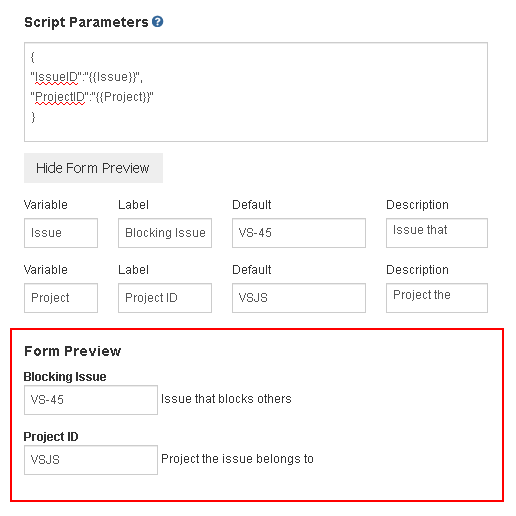
You can see what the end user form will look like by clicking the "Show Form Preview" button.
Once you've completed your extension, click "Create Extension" and the JavaScript Extension will add a new icon to your Extensions folder with the name that you assigned to it. Once you've saved your extension, you can run it and add parameters to it for users to use as input fields. If you (as the author) click on your new extension icon, you'll return to the extension dialog that lets you edit the code and parameters. You can run it or edit the code or parameters.
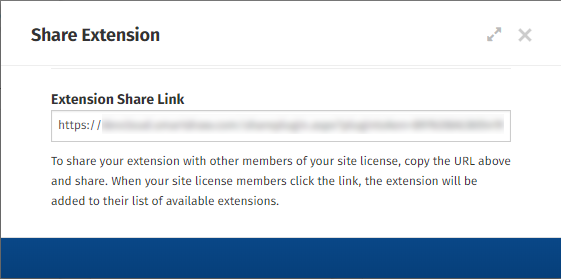
You may also want to make this extension available for other users. You do this by sharing it with them.
Right click on the Extension icon and choose "Share". This copies a share URL to the clipboard. Paste this into an email and send it to anyone you want to be able to use it. If the user clicks on the link, the icon for the extension will appear in their Extensions dialog. When they run your extension, they won't see the code used to configure the extensions, they'll only see the UI you built for them.
Note that sharing is only allowed between users that share the same SmartDraw Enterprise Site License.
Running a Shared Extension


